
Rather than create a video, I thought I would show you full step-by-step pictorial instructions on how to install the rectangular hatch on a Hobie 2015 Outback.
You will need the following items…
Hobie rectangular twist and seal hatch 71707001
Flange gasket for rectangular hatch 71707002
Self tapping SS screws (14) for Hobie rectangular hatch 8032121

You will also need the following tools…
Jigsaw
Screwdriver
Drill
I wanted to have access to the hull for larger items, and had seen the rectangular hatch install on 2014 Outback models. Also wanted to use the Hobie tackle management tray for my Plano boxes (71708001). Its standard fare on the PA12 and 14, and flips up and down with the lid of the hatch. The Hobie rectangular bucket (71709001) is also designed to fit inside the hatch – but note that it does NOT fit on the 2015 Outback using these instructions (although I have heard that it can be done if you seat the hatch longways, rather than across). I had another idea up my sleeve anyway ![]()
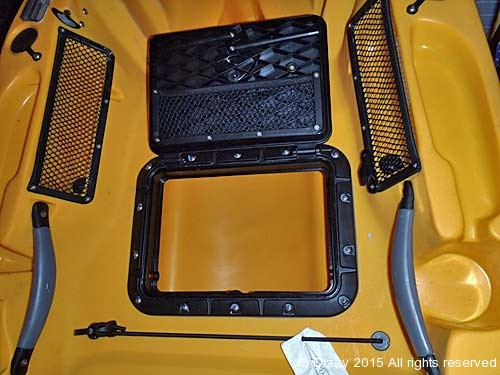
This is what the standard 2015 Outback looked like (with the round hatch installed)…

First thing to do was to unscrew the screws holding in the circular hatch in…

Once the circular hatch is out of the way, you can use the backing plate as a template for marking out where the hatch is going to sit. Remember that the backing plate is upside down, so the indents which stick out a bit (for the locking latch on the lid of the hatch) will be at the front, rather than the back of the template. Use a marker pen to mark out a template…

I used the existing hole left by the circular hatch as a guide, but actually, using the mirage drive trough is a better idea if you want the hatch to lie central.
After marking out the template, double check that you have things set up correctly by offering up the hatch over the top (with the handle of the hatch closet to the seat). Always be sure that you are happy with the template, as once you cut it out, there is no going back !
Take the jigsaw, and cut the template out. Keep the cut-outs from the hull, as they can come in handy with repairs etc.

Now you should have a cut-out. Check that the hatch fits snugly, and that there are no rough edges on the plastic.

Place the hatch in the cut-out, and mark out the drill holes using a marker pen. Make sure that the hatch is depressed tightly against the hull (especially on the front edge nearest the seat).

Use a small drill bit (much smaller than the hole in the backing plate), to drill the holes. My advice would be, rather than drilling all of the holes in one go, drill them in sequence, and use the screws to hold the hatch down as you go. You can then use the hatch as a template (drilling through the holes in the top of the hatch. You can also check that the holes line up with the template you created earlier.

Once the holes have been drilled, make sure that there are no bits of plastic left on the top or underneath the drill cut (if the surface is not clean and smooth then it will be difficult to form a waterproof seal).
Next put the back plate inside the hull, read for it to be screwed on to the top part of the hatch.

Add the gasket to the underside of the hatch lid…

Make sure that the gasket is properly seated, paying special attention to the part of the lid where the latch arm sticks out.

Open the hatch, find the bag of self tapping screws….

Place the hatch lid and gasket onto the hull of the kayak, and line up the holes drilled earlier. With the hatch open, use one hand to push together the hatch and the back plate. With the other hand, use a screwdriver to insert the screws. Make sure that the screw goes into the hole in the back plate.

Work your way around the hatch lid, adding the screws as you go. It becomes easier as more screws are added…

Apply some silicon sealant to the base of the screws before they are tightened…

Wipe off any excess sealant, and then put your hand into to the hatch and check that the back plate is tight against the underside of the hull all of the way around.

Now, your hatch installation is complete, and should look like the one below…
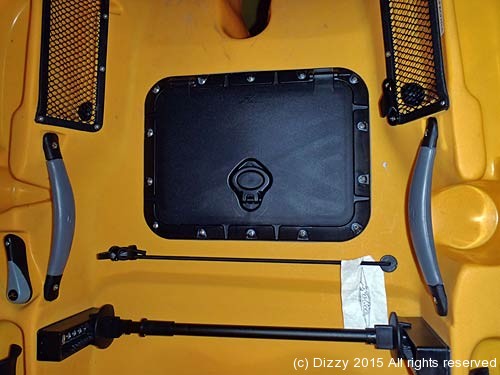
That’s it – you just need to wait for the sealant to dry, and you are ready to do some peddling.
Have a Hobie day !
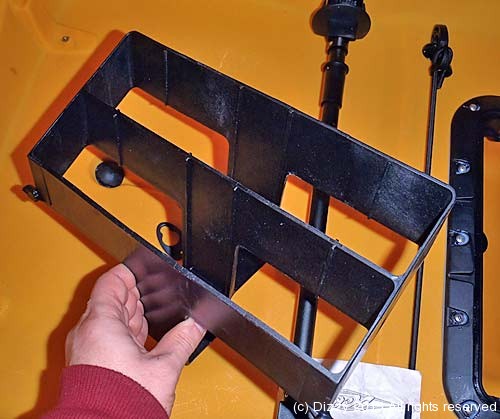
Update 24/2/15 – Hobie tackle management tray for Plano boxes (71708001)
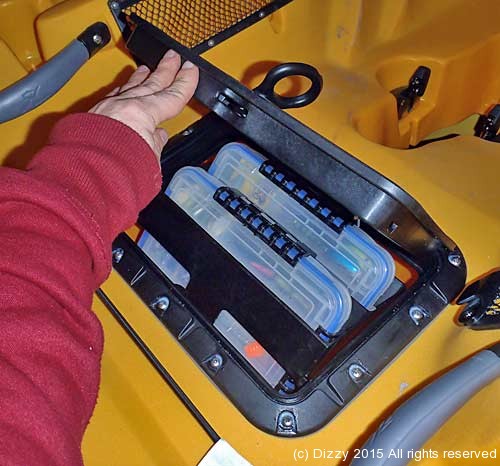
I fitted the Hobie tackle management tray today. It was really simple. The tray holds 2 Plano tackle boxes, and is attached to the rectnagular hatch lid by a length of cord (not supplied). As the lid to the hatch is opened, it lifts the plano boxes up, so you can grab them.
Tie a couple of overhand knots in the length of cord, and pass it through the hole in the bottom of the tray. Take the other end and tie it to the clip shown in the image below…
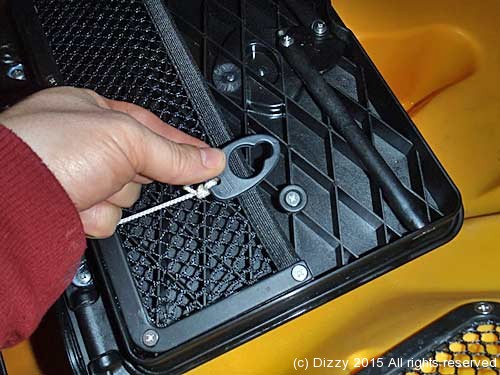
Before tying the cord to the clip, adjust the length so that the tray lowers correctly when the hatch lid is closed. Note : You need to adjust the length of the cord whilst the Plano boxes are inserted in the tray (the cord goes around the top of the boxes).
Hatch open (plano boxes lifted)….

As the hatch is closed, the boxes are lowered…
Stay tuned, for a mod to the Hobie rectangular bucket (71709001).