This guides provides you with a complete guide for setting up a Hobie Revolution kayak for sailing. It includes step-by-step instructions for adding the sail, upgrading the rudder, installing sidekicks (outriggers) and making a DIY gizmo to furl and unfurl the sail whilst on the water.
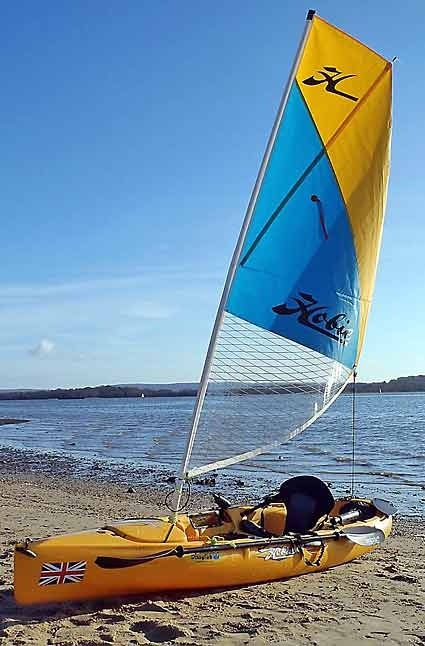
Sail
Setting up the Hobie sail couldn’t be easier. Simply slide out the sail and mast from the supplied bag, and slot the lightweight two piece aluminium mast together. Thread the sail along the mast (starting at the thinner end of the mast). Hobie kayaks already have a factory fitted holder for the mast, built into the hull of the kayak, just in front of the forward hatch. The sail has a small loop of shock cord which can be hooked over the plastic button in front of the mast holder. The shock cord keeps the sail tensioned against the mast.
The sail is controlled using a cord or sheet which is attached to the bottom edge of the sail. Increasing or releasing tension on the main sheet will change the shape (and the performance of the sail). I added a small carabiner to the rear pad eye at the stern of the kayak to run the main sheet through. Its just as easy to use the rear pad eye, but the carabiner is a bit more flexible.
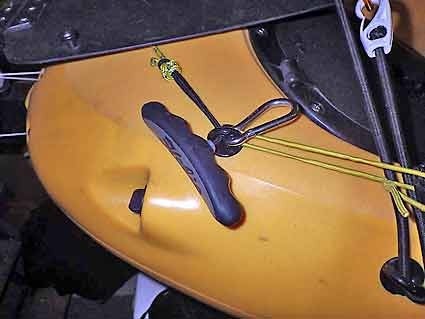
The main sheet runs from the sail, through the carabiner at the back of the kayak, back to the seat (I have added a cleat to fix the sheet – but to be honest, most of the time, I just hold it in my right hand).
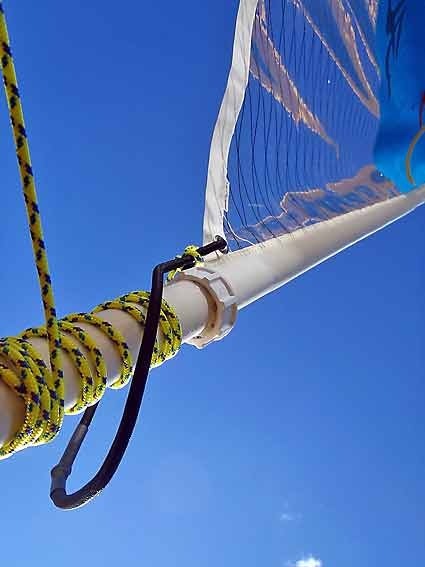
You will also notice that just above the corner of the sail from the sheet is a plastic hook. This is used when packing the sail away. The sail can be rolled up, and a knot in the main sheet can be wedged into the hook to stop the rolled up sail unravelling when it is stored in the bag.
Furling/Unfurling Gizmo
Whilst scanning the internet looking for ideas; I noticed that a couple of bright sparks had made a simple gizmo which allowed them to open and close the sail whilst at sea. It seemed like a great idea, so I made one myself…
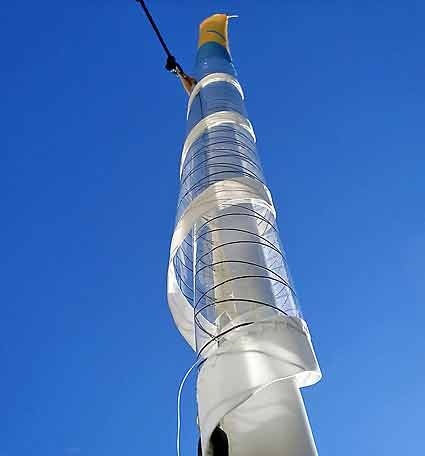
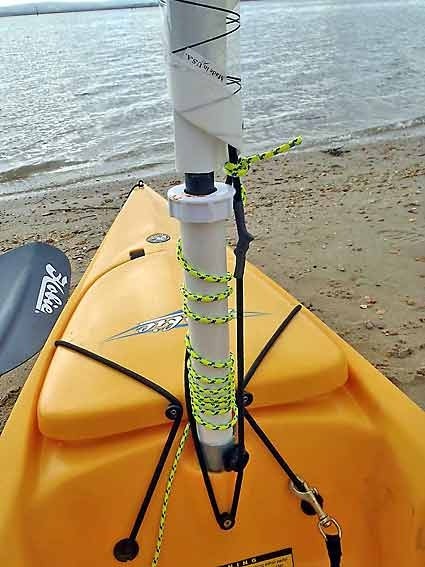
I started by buying some 1.5 inch (36mm) diameter PVC tubing from my local DIY store. I cut it to the correct length for the Hobie Revolution 11 sailing mast (29cms). The tube should be quite loose when it is fitted onto the mast. Then I made some caps (you can use the caps from de-odourant cans) for each end of the tube. I fixed the caps in place using silicon sealant, and then drilled a 25mm hole in the end of the caps (this should stop the tube from rattling around on the mast).
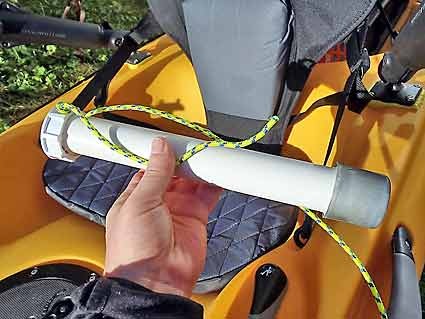
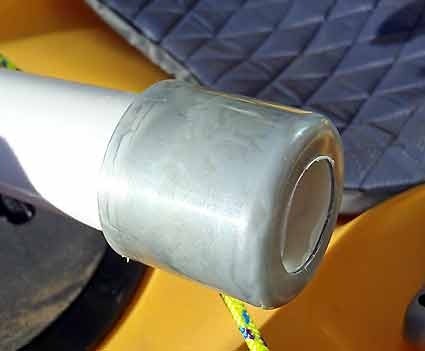
I drilled 2 holes in the side of the tube (near the top) – large enough to pass through a length of nylon cord. The cord is passed from the outside of the tube through the lower hole, into the tube, and then back out through the upper hole.
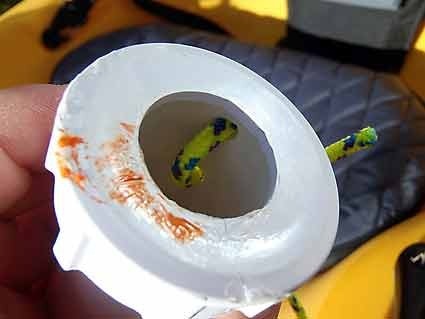
I then tied a knot in the cord outside the tube, to stop it being pulled back through the holes.
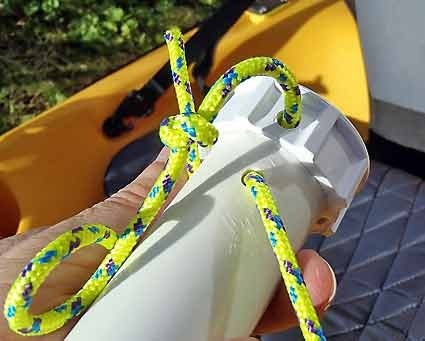
The cord is wrapped around the outside of the tube (from top to bottom). And the short end of the cord above the tube is knotted onto the top of the elastic shock cord on the sail. I am sure there is a better/quicker way of attaching the gizmo cord to the sail (a small carabiner clipped through the eye in the sail would be better) but a knot will suffice for now. The length of cord between the top of the tube and the sail, should be as short as possible.
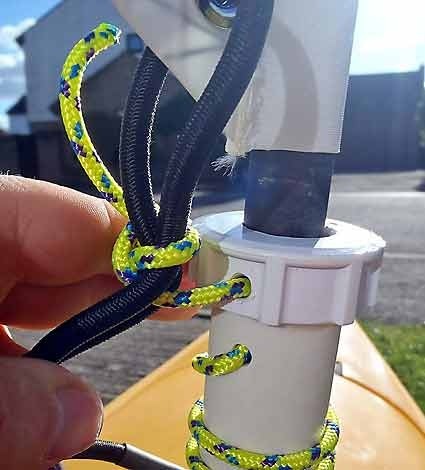
The Gizmo is designed to spin the sail around the mast – it is not meant to move the mast in any way.
Closing (furling) the sail
The sail can be closed by pulling on the free end of the gizmo cord – this spins the sail around the mast and rolls it up (the main sheet should be fed out whilst you are doing this). Once it is rolled up (furled) – the shock cord can be looped over the button to keep everything in place.
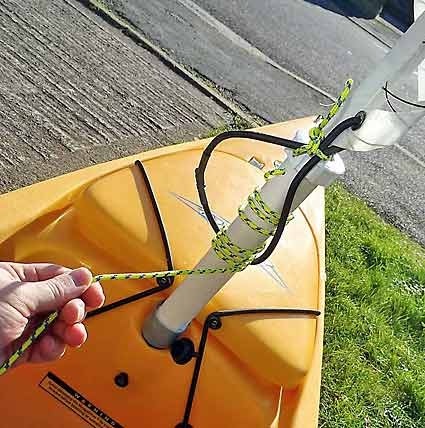
Opening (unfurling) the sail
To open the sail, simply unclip the shock cord, and pull on the main sheet (you will need to maintain tension on the gizmo cord whilst you are doing this). The sail will open, and again, the shock cord can be clipped back into place.
Upgrading the rudder
You can fit a sailing rudder on the Hobie to improve handling. I went one step further an added the rudder from a Tandem Island on my Revolution 11.
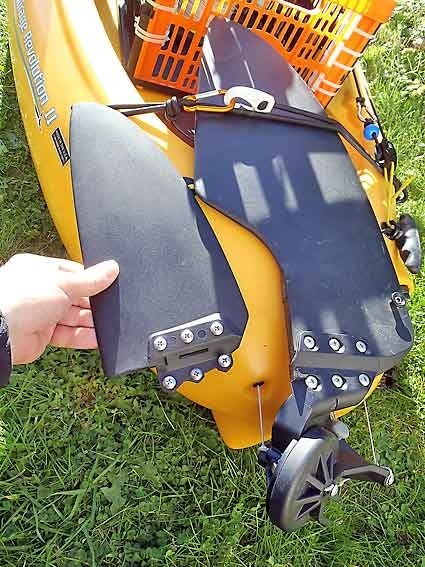
The upgrade has improved performance and handling – full instructions on the rudder upgrade and associated rigging can be found here.
Fitting sidekicks/outriggers
Hobie provide an outrigger kit for their kayaks, which improves stability when using the sail (or when sanding up in the kayak, for example if fly fishing).
The Hobie AMA Sidekick kit contains the following items…
1 Lightweight aluminium crossbar and fixing brackets to attach permanently to the kayak
2 adjustable lightweight arms and floats (these use a quick release button so that they can be attached/adjusted/removed quickly)
Repair patches and glue for floats
Well nuts for fitting the brackets to the kayak
Set of instructions
Fitting the crossbar
The first task is to attach the main crossbar to the kayak. The location is very important, as it remains in place once fitted. The usual position for the main crossbar is behind the seat near the tankwell.
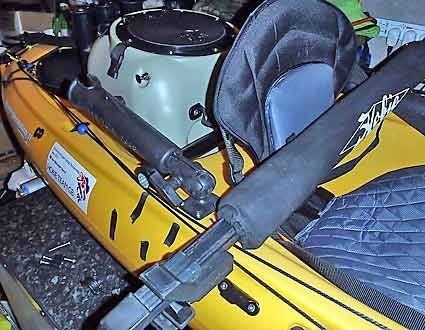
I checked that the location of the main crossbar did not interfere with the following…
- Seat – Make sure that the crossbar does not interfere with the seat when you lean back.
- Roof bars – If you transport the kayak on the roof of the car, make sure the crossbar is not going to interfere with car topping. The black tape in the image above, marks the location of the roof bars when the kayak is being transported
- Rod holders – I use RAM tubes which I angle backwards – bear this is mind when fitting the crossbars
- Livewell – Make sure the location of the crossbar does not interfere with the livewell if you use one
- Crate – As with the livewell, make sure your crate still fits with the crossbar in place
Probably the most important consideration (especially on the Revolution 11) is the location of the adjustment holes in the crossbar tube. The crossbar contains 3 holes which are used to adjust the height of the floats – high, medium or low in the water. Ideally, the holes should be located at the top, middle and underneath the tube. However, due to location constraints above, I could not locate the crossbar over the tankwell. Consequently, I had very limited space under the crossbar in the areas where the holes in the crossbar were located. I would not have been able to reach the adjustment button if it was in the low position, so I compromised and rotated the crossbar slightly. Make sure you check this before fixing the crossbar.
Once I had selected a suitable location for the crossbar, I marked out the position, using marker pen and the lower attachment bracket.
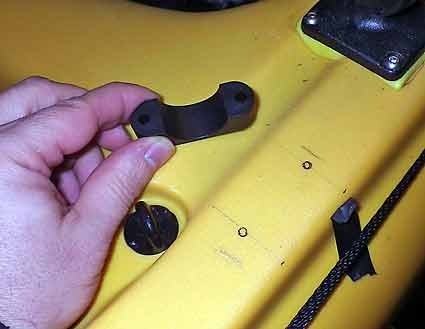
It is really important to ensure that the crossbar is fitted square to the kayak, and that the brackets are fitted directly in-line on both sides of the kayak. The are not many fixed positions to measure from (I measured from the end of the carry handle to check alignement on both sides). Also remember that the sides of a kayak are curved, and not parallel !!!
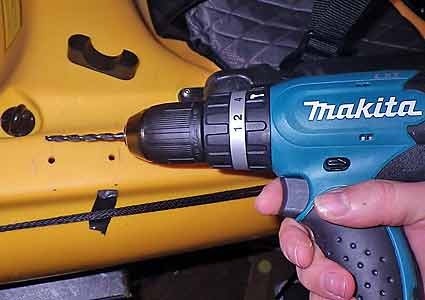
Next I drilled the holes. The supplied well nuts use a 3/8 inch drill bit. I used a small drill bit to make an initial pilot hole, then enlarged the hole using a 9mm drill bit. This provided a snug fit for the well nuts.
Next (Hint) attach the sleeves of the well nuts to the bottom of the base attachment, then add the crossbar, and the top bracket and screw in the bolt so that it just engages in the sleeve (so the whole thing is connected).
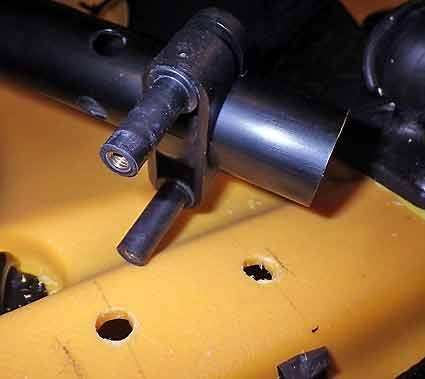
This makes things much easier – now you can insert the sleeves through the holes with the bolts and tube already attached. Do the same on the other side of the kayak, and then tighten the nuts up bit by bit on both sides, until the crossbar is fixed in position.
Now the crossbar should be fitted square to both sides…
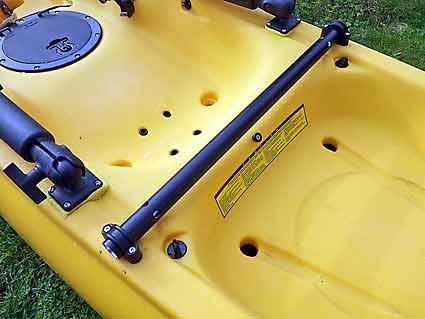
You can see why I needed to rotate the crossbar slightly (there is not much of a gap between the surface of the kayak and the crossbar)…
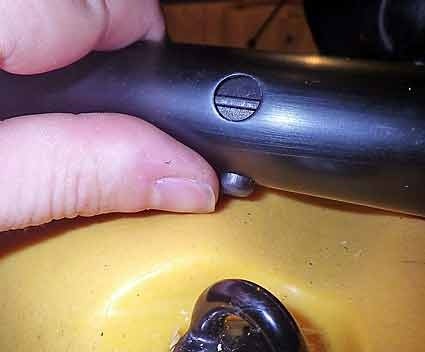
Fitting the sidebars
The side bars simply slide into the crossbar and click into one of the 3 positions.
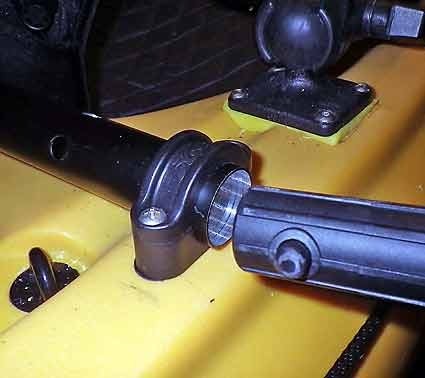
High…
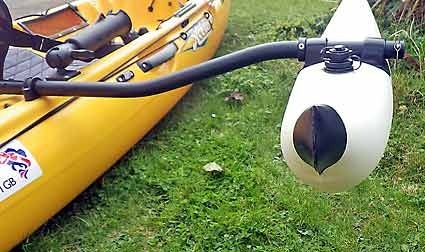
Middle…
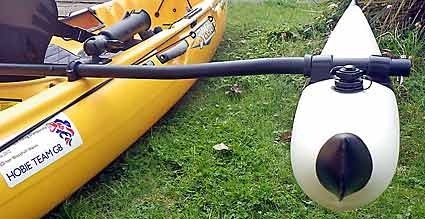
Low…
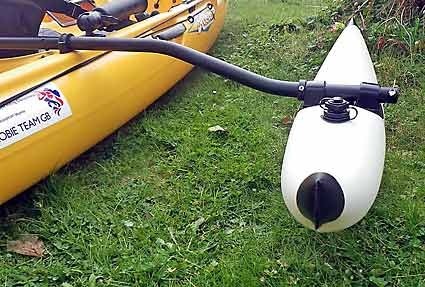
Fitting the floats
The floats are inflatable and they slide on to the end of the sidebars, locked in place by a clip.
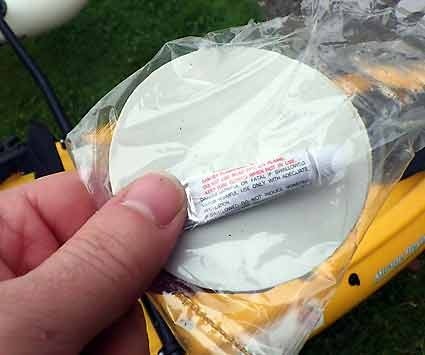
The floats come with a repair kit – including patches and glue, which is a nice touch…
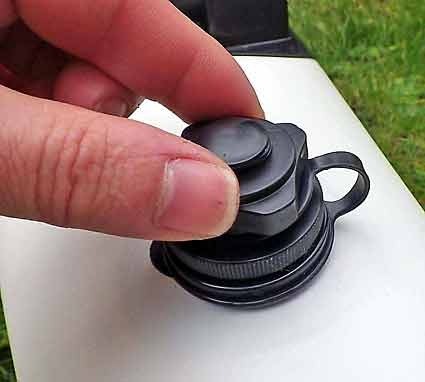
The valve configuration is nifty – you inflate them using the top valve (only takes a few breaths to fully inflate)…
And deflate them using a (bigger) valve at the bottom – its very quick…
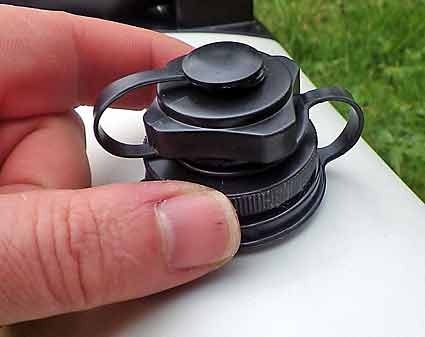
The two brackets at the top allow them to be slid on to the side bar…
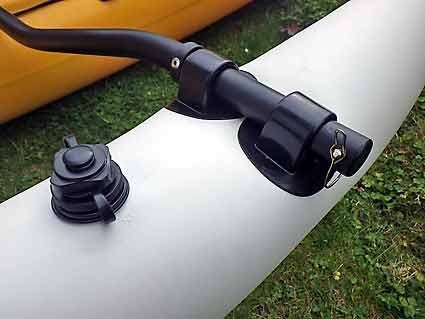
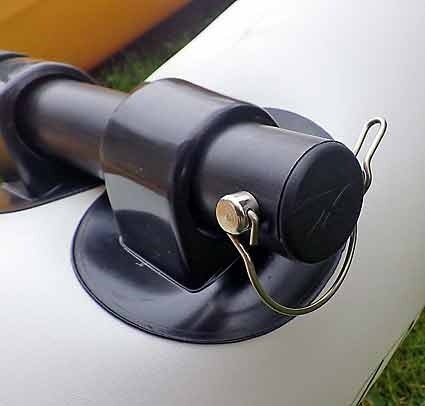
Once in place, a simple clip stops them from sliding off the end of the tube…
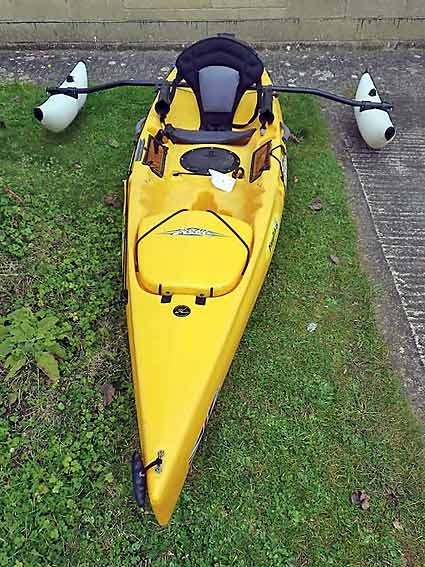
This is what the side kicks look like when fitted…
Sail Trials
I am no pugwash, but recently I donned my yellow wellies to try out the sail on the Revolution 11 by the Hobie Cat Centre at Rockley on the shores of Poole Harbour. It was a gorgeous day – probably not great for “true” sailors, but great for a newbie like me. The gentle wind allowed me to try out the sail and gizmo without the use of the side kicks (although it was very clam, and I think I will use the side kicks its breezy). Everything went really well, and I was really surprised how well the gizmo worked for furling and unfurling the sail.
I had alot of fun, and managed to take some video and lots of pictures.
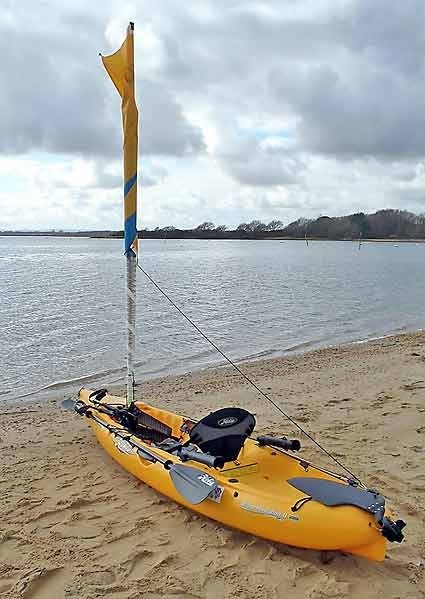
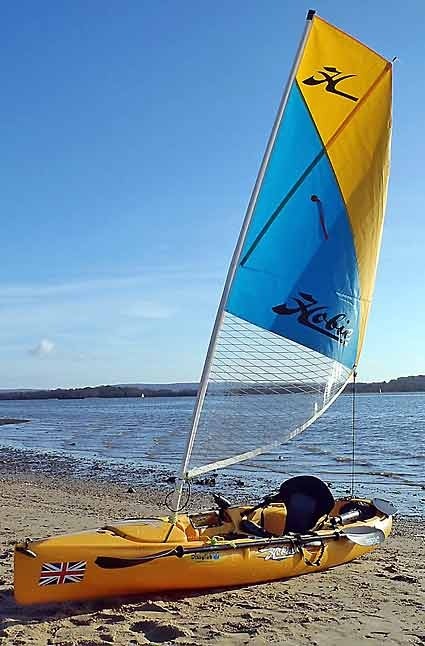
I am working on an improved adjustable cleat for the main sheet, and will add more when I have finished – I will also try to add some video of the trip, so you can all have a good laugh at my cak handed efforts.
Happy kayak sailing !
