RAM tubes are a versatile solution, and very popular for kayak fishing – especially in the UK. They enable the fishing rods to be held in position when at anchor, so that they are close at hand; but also allow the rods to be swept back 180 degrees flush with the stern of the kayak when entering or exiting the surf to protect the rods in case of capsize.
Hobie sell a RAM tube kit which includes the RAM ball, the tube, a backing plate, 4 stainless nuts and bolts and an allen key. There are two different types of kit, one featuring a marine grade aluminium tube and the other containing a plastic tube. I was using the plastic tube version of the kit.
Having installed RAM tubes on several different makes of kayak, the single most important consideration when fitting them, is the placement location on the kayak…
You need to take into account the following, when determining where to fit them…
1. Add all of you hardware on the kayak – including the seat and the wheels (stowed plugged-in, on top of the kayak) – then sit in the kayak – the RAM tubes need to be in a location where the rods sit alongside you, and are easily reachable.
2. Make sure the location does not interfere with any other hardware – eg the rudder knob
3. Also take into account where the RAM balls are going to be when it is being transported on the car roof – will the location interfere with roof bars etc
4. Also take into account how easy it is to get access to the inside of the hull in order to tighten up the nuts and bolts (how close is the location to a hatch – and check you can reach the inside with your hands)
5. Check the inside of the kayak to see if there are any control lines of other obstructions where the bolts and backing plate are going to be located
I was fitting the RAM tubes to a Hobie Revolution 11. Having fitted RAM tubes before, and taking the above points into consideration, there was only one location where I wanted to fix the tubes….. those immortal words sprang to mind “Houston, we have a problem !”
The location where the RAM tubes needed to go, was awkward…
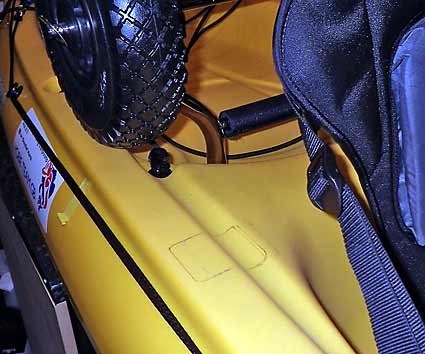
In the one place where the RAM tubes really needed to go, was a small gutter in the hull of the Hobie 11. This would make a standard fit difficult from the surface, and almost impossible from inside the hull with the standard fitting plate.
A light bulb moment was needed….
Then it came to me; my buddy Dave Harrison, a top kayak fisherman had been telling me about a product he had used, called polymorphic plastic. This amazing product becomes like plastiscine when it is heated, and can be moulded into any shape or form. When it cools, it becomes a very hard and stable plastic. The best part is – once cooled, is can be heated up again to make it pliable. It sounded perfect.
I managed to find Dave’s posts on the Anglers Afloat forum, and by chance, saw some posts from two other kayak fishermen Leadzep and Nobby who had done something very similar, so it looked like I was on to a winner.
I sent away for some polymorphic plastic from eBay, and also ordered some yellow colouring to match the Revolution 11.
The basic idea was to create 2 pieces of plastic…
– One piece of plastic to sit on top of the hull and provide a flat base for the RAM ball to sit on, and
– The other piece of plastic to sit inside the hull and form a flat base to secure the bolts to.
Creating the surface mount
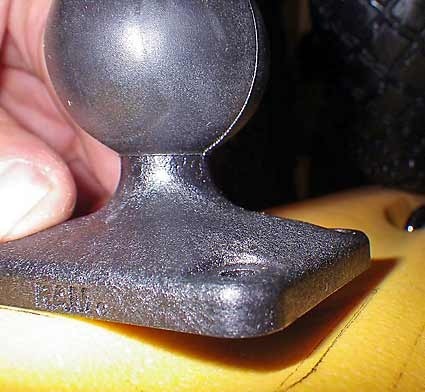
As you can see from the image below, I needed to provide a stable flat base for the RAM ball to enable it to sit securely over the gutter in the hull (to stop the RAM ball from rocking from side to side)…
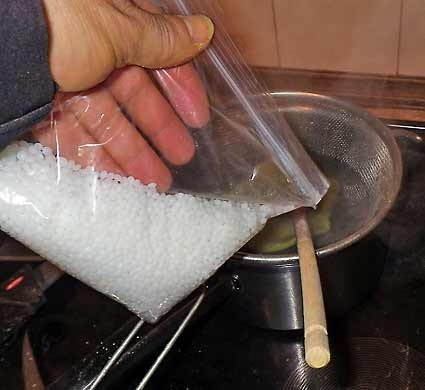
First , I heated up some of the polymorphic plastic granules in a saucepan of hot (not boiling) water (the water needs to be 60 degrees celcius or above to mould the plastic). I used a sieve to keep the granules together…
Once the granules have been heated to the correct temperature, you can take them out of the water, and mould the plastic into a thin disc.
Then take some of the coloured powder coating and shake it out into the middle of the disc (1 part of powder coating to 20 parts of plastic – so not much colouring needed). Keep folding the disc into itself, and eventually the colour will mix across the plastic.
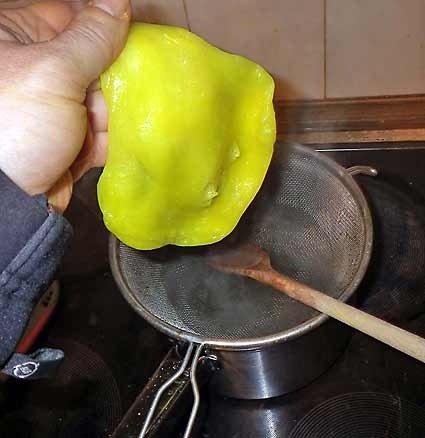
Put the yellow pancake back in the hot water to melt it again, then when it is soft, take it out and mould it into a thin wedge, use the base of the RAM ball as a guide.
Use a marker pen to draw around the base of the RAM ball in the position where you want to locate it.
Take the plastic and mould it on top of the hull, so that it fills the area you have marked out above. Push the plastic into the gulley – remember, you are aiming to provide a flat surface on which to secure your RAM ball. When you are happy with the location of the plastic, push the RAM ball down on top of it…
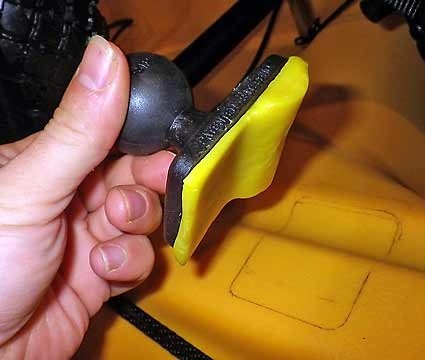
Then leave the plastic to cool and harden.
When the plastic has cooled, use a blunt knife to prize the plastic away from the RAM ball…
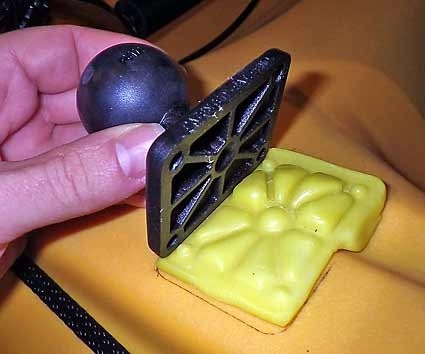
Now you have a secure surface mount for the RAM ball.
Creating the In-Hull mount
You need to do something similar to form a stable mount on the inside of the hull.
Repeat the instructions above (you don’t need to colour the plastic), to produce another surface mould. Make sure that the top of the plastic is as flat as possible (don’t push the RAM ball into the surface). You should end up with something like this…
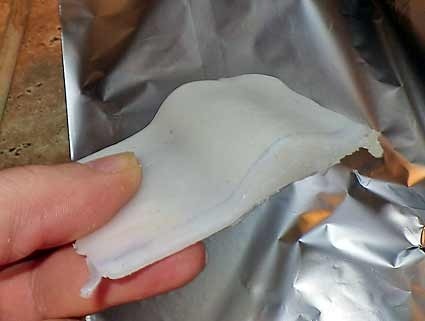
Wrap it in silver foil and place it into a container which is a similar size…
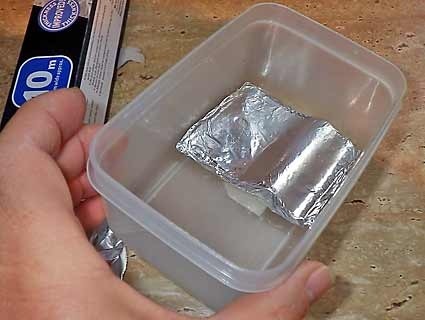
This is going to form a mould, to enable you to create the inverse shape to fit on the inside of the hull.
Mix up some more granules, and when melted, mould them over the top of the silver foil coated mould. Push the plastic down firmly, and try to create a flat even surface on top (push down with a flat peice of metal to achieve a really flat surface).
You should end up with something which looks like this…
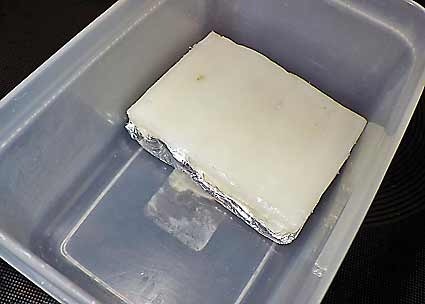
Allow the plastic to cool, and separate it from the mould.
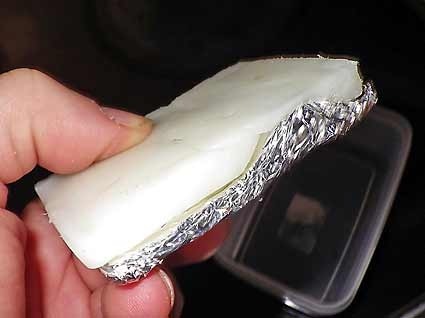
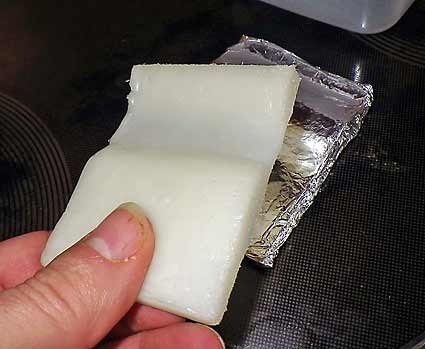
Now you should have a backing plate which will fit inside the hull.
As a rough check; take the two inserts and place them back to back – if all is well, they should fit quite closely…
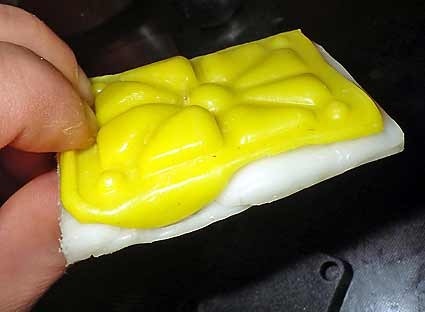
Putting it all together
Ok, so now you have made your plastic inserts which will allow you to mount the RAM ball securely on top of the hull.
There are 2 ways to secure everything to the kayak….
1. Using the supplied backing plate, nuts and bolts OR
2. Using the polymorphic plastic as a backing plate
Method 1, needs no additional items and is very secure, but is alot more difficult (and more prone to error). Method 2 is much easier, but you will need some additional stainless steel nuts and penny washers.
I will show you both methods…
Method 1 – Using supplied captive backing plate
You are going to form several layers – a plastic sandwich if you like…
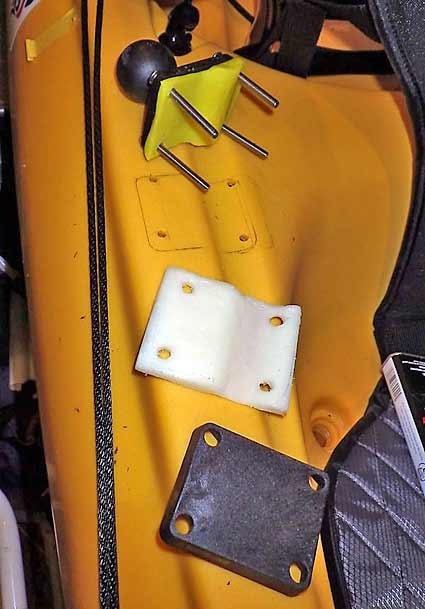
In the image above, the white polymorphic plastic insert and the backing plate will be located inside the hull.
Place the RAM ball in its intended location. Draw around it again with a marker pen. Also mark the holes where the bolts go through.
Hold the yellow polymorphic plastic insert against the RAM ball and mark the drill holes.
Hold the white polymorphic plastic insert against the backing plate and mark the drill holes.
Drill the plastic inserts (white and yellow) and the hull of the kayak. Check that supplied bolts line up through the holes you have drilled.
Fit the RAM ball and the yellow insert on top of the hull and pass the bolts through them. Reach into the hull of the kayak ,through the hatch, and slide on the white insert and the backing plate.
Take the supplied nyloc nuts and gently screw them to the ends of the bolts. Then from outside the hull, use a pair of needle nose pliers to carefully lift up the bolts. The backing plate has captive housings for the nuts – but they will have to be rotated and lifted until they fit into the captive housing.
The image below shows 3 of the bolts located in the captive housing, and the last bolt (bottom left) just about to be carefully rotated and lifted into position.
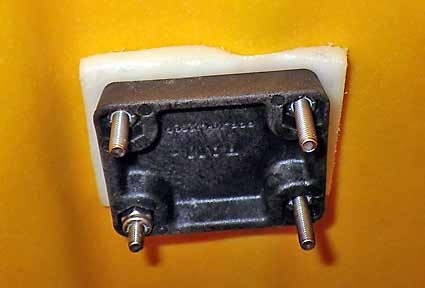
Once the nuts are located in the captive holders, you can use the supplied allen key to tighten everything up. I would recommend coating the bolts and inserts with marine silicone, goop or sikaflex prior to tightening everything up, just to keep everything watertight.
Alternative Method 2 – Using plastic insert as backing plate
Using this method (much easier), you can dispense with the supplied captive backing plate (the white polymorphic plastic insert will act as the backing plate). But you will need the following additional items (not supplied in the Hobie kit)…
4xM5 stainless steel (non nyloc) nuts (the use of non-nylocs, makes the install much easier, especially if the mounting location inside the hull, is hard to reach)
4xM5 stainless steel penny washers
Mark and drill the white and yellow polymorphic plastic inserts and the hull of the kayak (as above).
Sandwich together the RAM ball, and the yellow plastic insert on top of the hull.
Pass the bolts through the RAM ball, the yellow plastic insert and the kayak hull.
Add the white plastic insert to the inside of the hull, and then add the penny washers and nuts to the end of the bolts.
Add a liberal coating of silicon/marine goop/sikaflex to the bolts/plastic inserts to provide a good seal.
With two people… one person reaches inside the hull and secures the nuts with a wrench/spanner, whilst the other tightens up the bolts on the outside of the hull with a screwdriver.
This is what the finished job looks like from the inside of the Revolution hull.
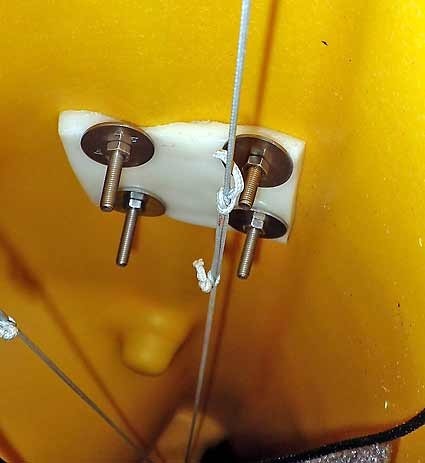
Another reason for favouring this method (over the supplied backing plate) is that it does not stick out so much – which is important, when the rudder control lines are so close to the installation.
The Finished Build
The polymorphic plastic is what makes this installation practicable on a Hobie Revolution 11.
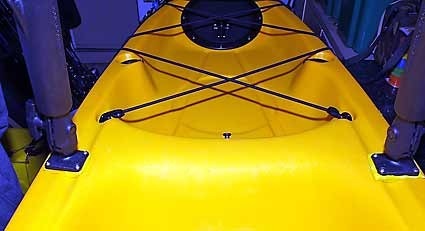
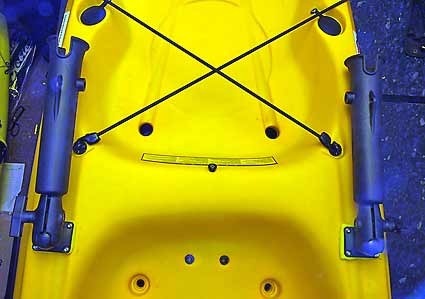
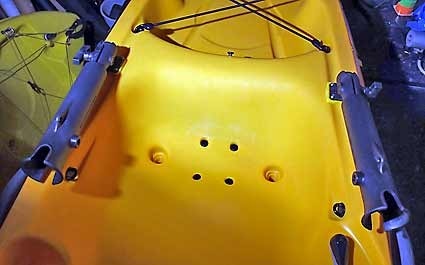
Here are a few images of the finished result…
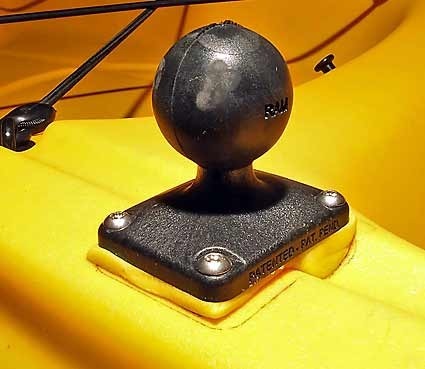
And with the RAM tubes fitted…
Job done !
