Until recently, I have always used waterproof boxes to hold my 12 volt batteries for kayak fishing. They were okay, but a lot of work, and tailored specifically to the size of the battery and to the space that they needed to fit into on the kayak.
I wanted something a bit more versatile; so last year I experimented with making a waterproof battery bag. After a few trail runs and some modifications, I managed to create something which was waterproof, portable, could be used for batteries of different sizes and was versatile enough to be fitted into nearly every kayak.
I have been using the battery bag for a year now, and lots of people keep asking me about how I made it, so I thought I would write up the instructions…
What you will need…
4 x 12mm M4 stainless bolts
4 x M4 stainless washers (small)
4 x M4 stainless nuts
4 x M4 stainless penny washers
Thick 12v electrical cable
12v sealed battery
3A blade fuse
Splash proof blade fuse holder
Index marine waterproof 12v socket and plug
Tough waterproof dry bag (ideally with a valve to expell the air)
2 x 12v battery connector clips
The dry bag I used, had a valve on it – this is really useful; when you close the bag and roll it up, you can use the valve to release the air inside and reduce the sixe of the bag.
Take the 12v waterproof socket (2 pin), and hold it up against the dry bag. Use a marker pen to draw around the outline of the socket and mark the holes.
Take the needle and heat it up with a cigarette lighter (be careful not to burn your fingers – the needle gets hot !!!!). Use the heated needle to make a small hole in each of the corners, to thread the bolts through (this technique makes small neat holes, and does not create rips in the dry bag material).
Using a pair of sharp scissors, cut a hole for the electrical cable to go through. The bag should look like this…
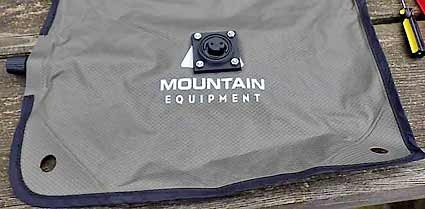
Push the 12v socket through the cable hole and turn the bag inside out. Thread the bolts and penny washers through the bag and out through the socket on the other side of the bag…
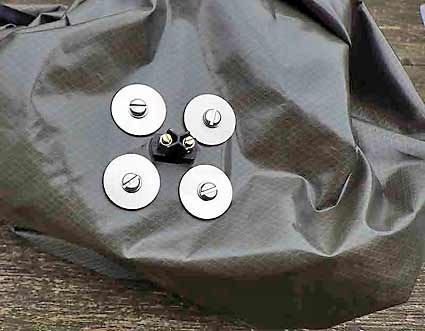
Turn the bag the right way around and add the small washers and nuts to the outside of the waterproof socket…
Turn the bag inside out once more, and connect the electrical wires up to the connectors on the back of the socket (I used different coloured wires for + and – to help me out. Red +ve, black -ve).
Wire in the 12v blade fuse on the positive wire, and add battery connectors to the end of both the +ve and –ve wires.
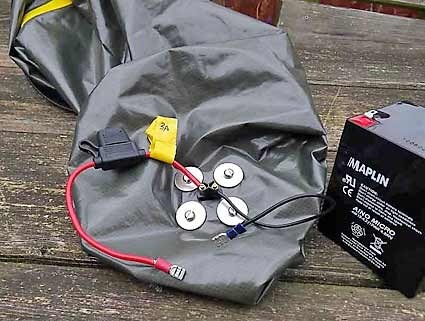
Don’t make the wires too short; its always better to have a bit of play in them, as the battery will move around inside the bag.
I also tape a spare blade fuse to the wires, in case the fitted one blows.
That is the bag sorted. The battery can be charged and placed inside and your electrics can connect to it using the waterproof plug…
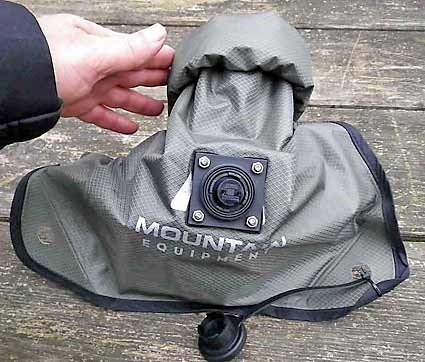
Now all you need to do is connect up your fish finder/GPS/bilge pump/nav light or other electrical gizmos, using the waterproof plug. I connected my waterproof 12v plug directly to the fish finder 12v cable…
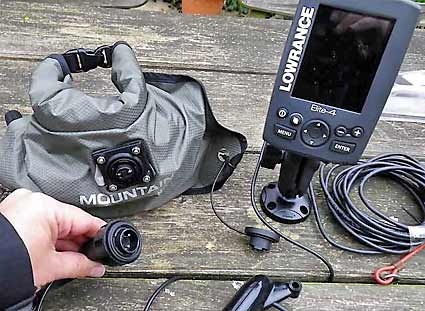
The waterproof plug uses a gland to make the connection waterproof. This then plugs into the waterproof socket on the bag. I tested it out before installing on the kayak, just to make sure everything was working ok…
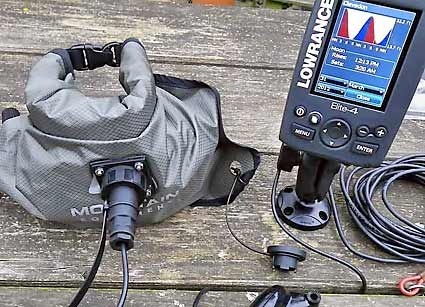
Both the socket and the plugs come with a cap which screws on when not in use to stop the pins rusting when they are lying in the hull of the kayak.
Its a great solution for kayak fishing; its waterproof, more versatile than a battery box, and easy to make.

![IMGP0377[6] IMGP0377[6]](https://dizzybigfish.co.uk/wp-content/uploads/2013/01/IMGP03776_thumb.jpg)
![IMGP0393[2] IMGP0393[2]](https://dizzybigfish.co.uk/wp-content/uploads/2013/01/IMGP03932_thumb.jpg)
![IMGP0394[2] IMGP0394[2]](https://dizzybigfish.co.uk/wp-content/uploads/2013/01/IMGP03942_thumb.jpg)