Anchoring in the kayak can be dangerous – the following is intended as a guide only. Always get appropriate training before trying these techniques and only venture out if it is safe to do so.
httpvp://www.youtube.com/playlist?list=PL76806E8856213A68
Most of my kayak fishing in the UK, is performed whilst at anchor. This can be difficult, especially where I live near the Bristol Channel, where we have the second highest tidal range in the world.
The system I use relies on the following pieces of kit…
- A 1.5kg folding grapnel anchor with a trip mechanism,
- 3 feet of 6mm chain,
- A diver’s reel,
- A bouy,
- A quick release mechanism
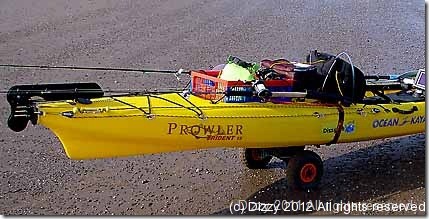
- An anchor trolley system attached to the kayak
The kit can be split into 3 systems…
The Anchor System
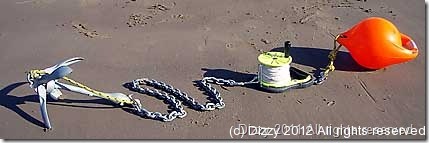
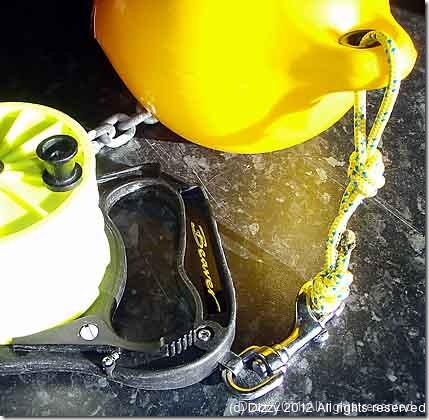
The anchor, chain and bouy and reel, are all connected together…
This anchor is foldable – this helps when storing it in the rear crate of the kayak.
It also has a ‘trip’ mechanism. This is supposed to help free the anchor if it gets stuck in a rock/crevice (ooooh errr missus !). There are several methods that I have seen for “trip” mechanisms – most involve attaching the chain top and bottom of the anchor. The most popular one involves using cable ties at the top of the anchor to attach it to the chain. People cut a small nick in the cable tie, the theory being that if the anchor gets snagged, they can pull on the anchor line and the cable tie will snap, allowing the anchor to be pulled from the bottom (which hopefully frees it). The only problem that I find with this method is that sometimes the cable tie breaks too easily, resulting in the anchor tripping – and you drift off down tide when you should be fishing ! I have also experienced the opposite, where the anchor does not trip when you are pulling like mad – very frustrating ! Recently, I have been using a commercial gadget purposely designed to trip the anchor when it gets snagged. Its called the anchor trip link, and I have reviewed it here…
https://dizzybigfish.co.uk/review-of-anchor-trip-link-clip/
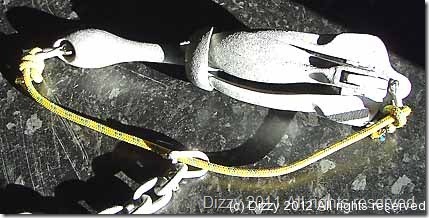
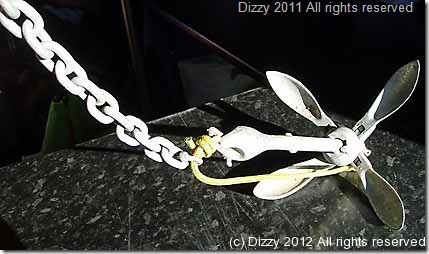
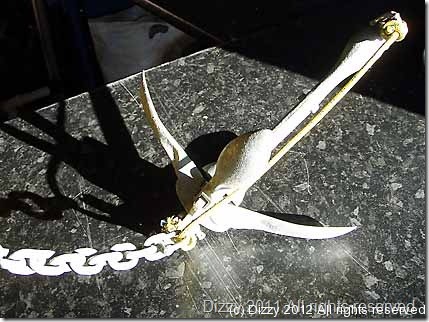
The other method for tripping the anchor is known as a bridle. I have used a bridle for a few years now – this is a small section of rope which runs from the top to the bottom of the anchor and attaches via shackles. The chain is attached via a shackle which is free to run along the length of the bridle.
There has to be a bit of slack in the bridle for it to work properly – too much and it will not work at all.
The idea is that when the anchor is set in the tide, the chain slides to the front and holds everything in place normally…
If the anchor becomes snagged, or you want to retrieve, you simply paddle up tide (past the anchor) and then pull the anchor from up tide of its position. The shackle slides to the bottom of the anchor and hopefully frees it….
“Why not use the anchor line all the way to the anchor and dispense with the chain altogether ?”
Good Question- I’m glad you asked ! Well, the chain actually makes a heck of a difference to the dragging power – apart from adding weight, it also changes the angle the anchor line makes with the anchor and irons out sudden movements on the line from the kayak which can shift the anchor. It really does work – I use 3 feet of 6mm chain – if the tides are not very strong where you fish, then you can get away with less.
The chain section is then attached to a length of Para cord/nylon which is wound onto a divers reel. Usually, you get the line for free when you buy the divers reel. The reel has a brake/ratchet which locks the line (stops it from coming out when anchored). To release the line, simply press the lever. Be careful when deploying the anchor over the side of the kayak – its a good idea to slow the revolving drum with your hand as the anchor drops to the sea-bed (otherwise you can get an overrun – a right mess). I attach my float to the anchor reel (but you can have it sliding along the anchor line).
I use a bouy which is big enough to support the weight of the anchor, but it is not essential. (I dropped the anchor system over the side, forgetting to let the line out ! If I hadn’t had a big float – the whole lot would have been lost to Davey Jones Locker !). I also like to use 3M reflective tape and sometimes an LED on the float when night fishing.
The Anchor Trolley
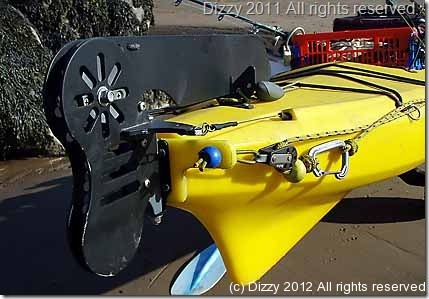
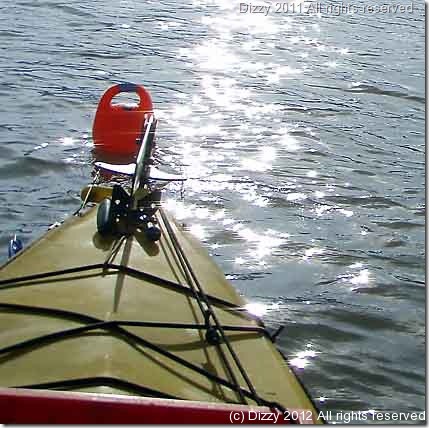
The Anchor trolley on the kayak, is essentially a mechanism by which the kayak can be tethered from the bow (or stern) to the anchor system. Obviously, you cannot reach the end of the kayak from your seated position amidships (unless you are Stretch Armstrong) – and anchoring from the middle of the kayak would push the kayak broadside to tide and waves – very dangerous. The anchor trolley uses 2 pulleys, some rope and a karabiner along the length of the kayak.
The anchor trolley allows you to move the anchor system so that it is as close to the stern (or bow) of the kayak as possible. The closer the attachment point is to the end of the kayak, the more stable the kayak will be in tide/swell. If it is not attached near the back of the kayak, then the kayak will be turned at an angle to the tide and will start to sway from side to side.
The pulley blocks at either end of the trolley line are attached to the kayak via a short section of elastic bungee. This absorbs some of the shocks as the waves and tide move the kayak around.
I have two anchor trolleys on the kayak – one from the stern to amidships, and one from the bow to amidships. You could use a single trolley which goes the whole length of the kayak, but I find that if you do this, the lines tend to cut across the cockpit area. It also gives me the ability to use the drogue on the front trolley whilst anchored off the rear trolley (when trying to fish in a wind against tide scenario).
For more information on how to set up an anchor trolley on the yak follow this link.
The Quick Release mechanism
This allows you to disconnect the kayak from the anchor system very quickly.
All three systems integrate to provide a simple, flexible solution to anchoring in the kayak. The following sections will provide more detail on the individual components.
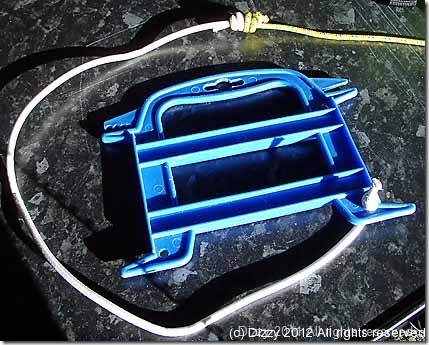
The quick release mechanism allows you to quickly attach and drop-off the anchor – or indeed any other suitable fixture – such as a pot bouy. I used to use a section of floating rope tied to the end of the divers reel, but the following method is much better…
My good friend James (Overrun) must take the credit for this – it is simple, quick and easy – I love it.
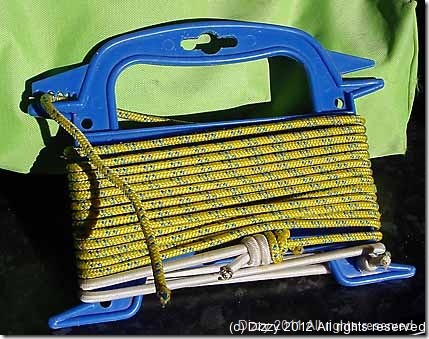
The reel and cord was bought from a well known DIY store for approx. £10. I then added a short section of bungee to the reel and joined the bungee to the nylon line..
The line needs to be long enough to reach from amidships all the way past the stern of the kayak, to the anchor bouy and back again.
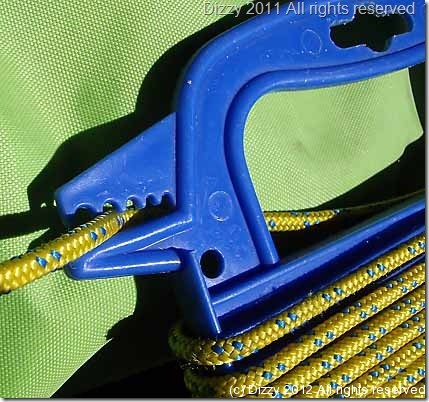
The reel also has teeth which keeps the line in place and avoids having line all over the place when it is not in use…
The most tricky bit is attaching the quick release to the anchor.
- Drag the anchor trolley back to the cockpit
- Clip the quick release reel to the anchor trolley karabiner from the end opposite the bungee, then pass the quick release line though the karabiner.
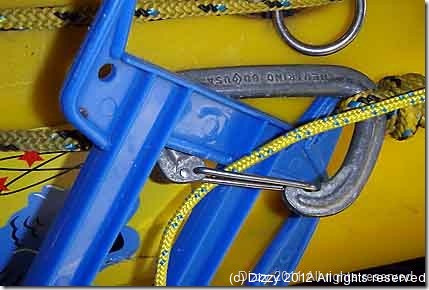
- Form a loop in the line and pass this over the anchor bouy (this assumes that the anchor has already been deployed an the bouy is in place)
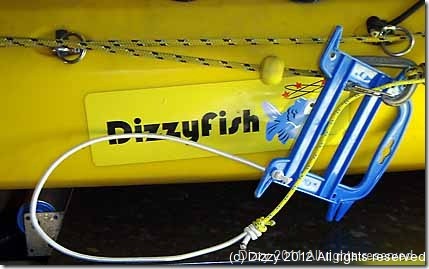
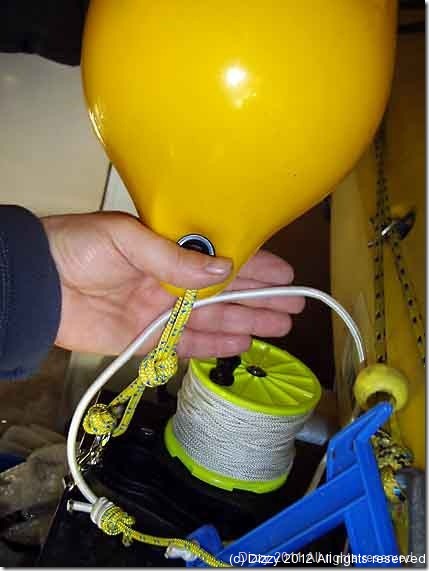
- Drop the anchor bouy and move the anchor trolley to the stern of the kayak (remembering not to let go of the free end of the quick release line !!!)
- Lock the anchor trolley in place. Note this can be done using a cleat, but I tend to wrap the trolley line around the handle of my RAM mount instead
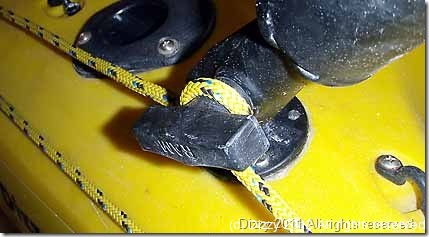
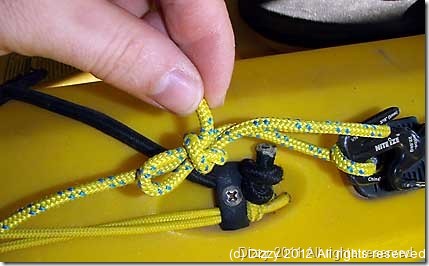
- Secure the free end of the quick release cord. Again this can be done using a cleat, but I use a gizmo attached to the kayak handle and a slipknot
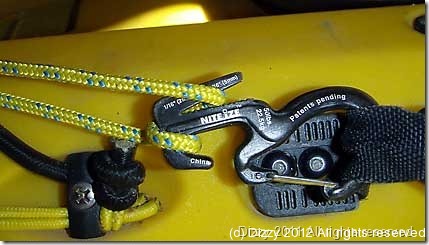
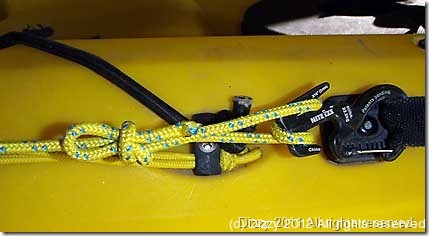
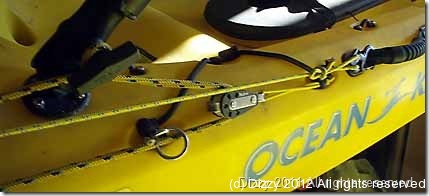
You are now anchored and locked off. It sounds complicated, but I promise you it is not. This is what it looks like when you are anchored up and locked off. From the cockpit …
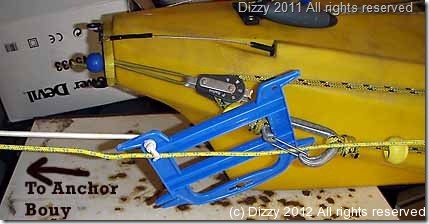
At the stern…
View looking out the back of the kayak when at anchor…
In order to release from anchor, just release the quick release !….
You can then unlock the anchor trolley and pull it back to the cockpit. The quick release line will simply slide around the anchor and the kayak will drift away with the tide.
You can use the same method to attach to pot bouys or attach to other kayaks etc etc – really flexible.
Anchoring
There is an art to accurate anchoring in the kayak – and I will be the first to admit that I get it wrong alot of the time !
Tide, wind and the depth of water all conspire to make things as difficult as possible. I must stress that I am no expert – but here is what I have learned…
I use a GPS and the fish finder together at the same time – for reasons which will become obvious. I am assuming that you already have the mark (or waypoint) programmed into your GPS. This is where you want the kayak to be, once you have dropped anchor and set everything up.
If I want to be accurate then I paddle to a point up tide of the target waypoint and let wind and tide drift the kayak for half a minute/minute with the GPS switched on. Then I look at the GPS breadcrumb trail which will show me which way the kayak has drifted and how close it was to the target waypoint. If you are lucky, the drift may have taken you directly over your target waypoint – if so, just paddle back to the start of the previous drift and skip the next bit. Invariably the drift will take you (hopefully !) close to the target – the idea is to paddle to a new start point where the drift will take you over the target. Remember that the new drift should be parallel to the original – so it just needs to shift a bit – you should be able to do this visually using the GPS.
Now for the tricky bit ! You need to drop the anchor in a position which allows you to end up over the target – so the anchor has to be deployed a certain distance/time before you hit the target. The three main factors which you need to take into account are :-
- The distance to your target waypoint (The GPS will show you this)
- The speed of the drift (the GPS will show you this)
- The depth of the water (this will be shown on the fish finder)
The first factor is dynamic – the distance to the target waypoint will be decreasing all the time and is directly proportional to the second factor – the speed of the drift. The faster the drift, the quicker the distance to the waypoint will decrease.
The speed of the drift and the depth of water should be relatively constant (if you are lucky !).
The faster the drift, the sooner you will have to drop the anchor (otherwise you will overshoot the target).
Use the things you know….
You know roughly how much anchor warp you need to let out – its approx. equal to 2.5 times the depth of the water. A very rough calculation is :-
Look at the distance to the target on the GPS, and drop the anchor when that distance reaches approx. 2*Depth of Water
Get everything ready for that point – have the trolley pulled back by the cockpit, the anchor unfolded, the quick release to hand etc. Remember to release the brake on the anchor reel ! And keep feeding line out, after the anchor has hit the sea bed.
Then either clip the quick release in, or if the tide is strong, paddle back up tide to the bouy and clip in.
If your final position is way out from the target waypoint, then you may have to up-anchor and re-position. Remember – that it is not an exact science – if the tide is running, then you may need to deploy the anchor sooner and let out more anchor line in order for the anchor to grip properly.
Then lock everything off – the anchor line and the quick release.
Up-Anchoring
I have seen several different methods used to up-anchor – this is the method I use. This is probably the single most tricky part of anchoring, and if something is going to go wrong, it will go wrong at this stage. Please bear in mind that these steps are for guidance only – there is no substitute for proper training – always be safe.
- Release the quick release (see the quick release section above)
- Store the quick release out of the way (in the rear crate)
- Paddle back up-tide to the anchor bouy
- Lift the anchor bouy and reel into the cockpit
- Paddle to a point well up tide of where the anchor is located
- Drift back down tide, pulling in the anchor warp by hand as you drift feeding the free line back into the water (making sure that the free warp line does not catch on you or anything in the kayak)
- Pull the chain and anchor into the cockpit
- Use the diver’s reel to reel back the free anchor warp onto the reel
- Store the reel, bouy, chain and anchor in the crate
I know that some people use a cleat and the anchor trolley when paddling back up tide to tie off the warp to the kayak. I would be interested in people’s view on this one – I prefer to have the lot where I can easily let go of the warp if there is a problem – it may mean I have to paddle back up-tide again – but I think it is safer.
Step 5 is probably the most problematic. If the anchor is stuck, then paddling up tide as in the steps should free it, using the trip mechanism outlined earlier in the article. Sometimes, no matter how well you follow the steps, the anchor will not budge – even with the trip. Do not be tempted to lean back and pull for all you are worth – more than likely, one of two things will happen a) The anchor will give suddenly and you will fall over backwards or b) A wave will lift the kayak and tip you off the side of the kayak. The best thing to do, is to release the line and to repeat the steps from step 5, and try to paddle back up tide at a slightly different angle. If after a couple of tries, the anchor does not free itself, then just cut the anchor warp. Better to lose an anchor and some chain than risk a capsize. This is another reason why it is always a good idea to carry a spare anchor and chain.

